Setting Obsidian Digital Garden(Make your own blog with Obsidian)
This post is simply to share my current blog configuration.
If you're not familiar with Obsidian yet, you can read all the way through the post, and if you just want to know how to configure it quickly, you can start from here.
Why Obsidian?
Feel free to post!!!
Probably most of the people reading this post know how to use Obsidian.
You may think of Obsidian as a local collection of Post-it notes and think that it doesn't fit in with blogging.
This is because (in my opinion) a blog post is like a well-organized gift package, not a bunch of scattered Post-it notes.
But back to the point, Obsidian is a giant collection of post-it notes to organize my thoughts, and it's a tool that aims to take advantage of that, so it's perfect for someone like me who doesn't do well under pressure.
It's a great way to get started because if you read the article below and decide to set up a blog with Obsidian, you can upload something that you wrote with the push of a button and it becomes your blog post without any pressure.
And then if you want fancy custom , you can add a little pretty picture to make your post , or you can just write a really simple review post.
Custom!, Fast!, Light! = No Pressure It's a perfect environment for someone like me.
Back to the point, let's create a blog.
For the specific code, I've published it on GitHub below, so you can follow along and set up your blog.
What? I don't even know how to write code?
Don't worry, this path is not about writing code to create a blog.
This article is about how to create your own blog.
Let's get started!
What you need
First, you need to set-up few things.
- you'll need the notes from the Obsidian you're using
- the next thing you need is an account on a site called GitHub.
- last but not least, sign up for a hosting site (like Vercel)
Install and set up the plugin
The next thing you need to do is install the plugin.
This is the core of what we're going to talk about today.
It's called Obsidian Digital Garden, and the first goal of this post is to follow up the guide below.
https://github.com/oleeskild/obsidian-digital-garden
digital garden
There is a lot of overlap with the content on the site, so please refer to the site's explanation for details.
First, install the digital garden plugin
Next, create a repository on GitHub (search the internet if you don't know how to create a repository)
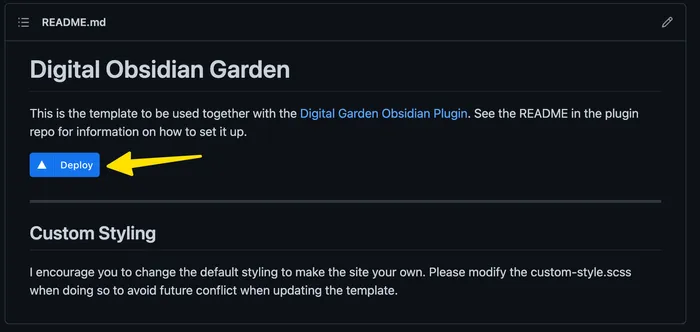
After creating the repository, click the link and press the "Deploy to Vercel" button.
Next, you need to create an access token for your GitHub account.
The token acts as a sort of password, and you need to create it before you can upload your post.
You can create a token by clicking the link (if you're having trouble, search the internet for GitHub token)
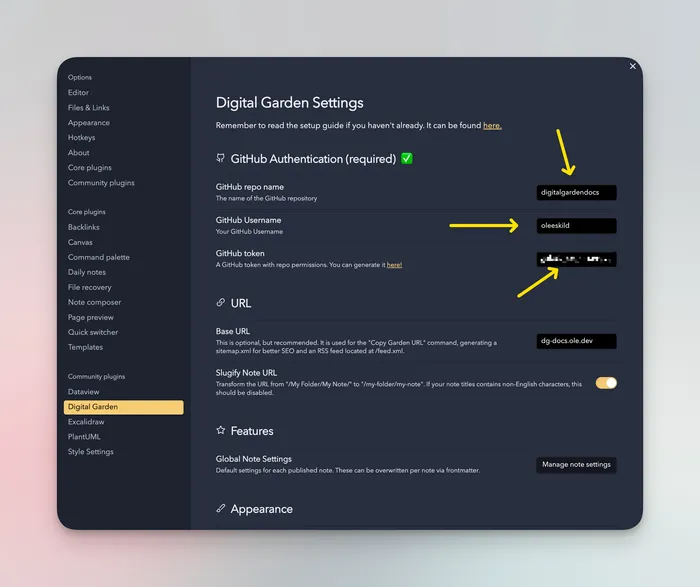
Now fill in the fields below.
- Github repo name: The name of the repository you created (e.g. digitalgarden)
- Github username: Your Github username (e.g. gangjeuk)
- Github token: The token you just created
Now we need to issue a note.
To determine which posts to upload, the digital garden plugin uses the property.
(If you don't know what property is, search the internet or create a new note in Obsidian and type ---)
Each property performs the following functions
| property | behavior |
|---|---|
| dg-publish | whether to make the note public |
| dg-home | make the current note the homepage of your blog (you should only assign one to a note!!) |
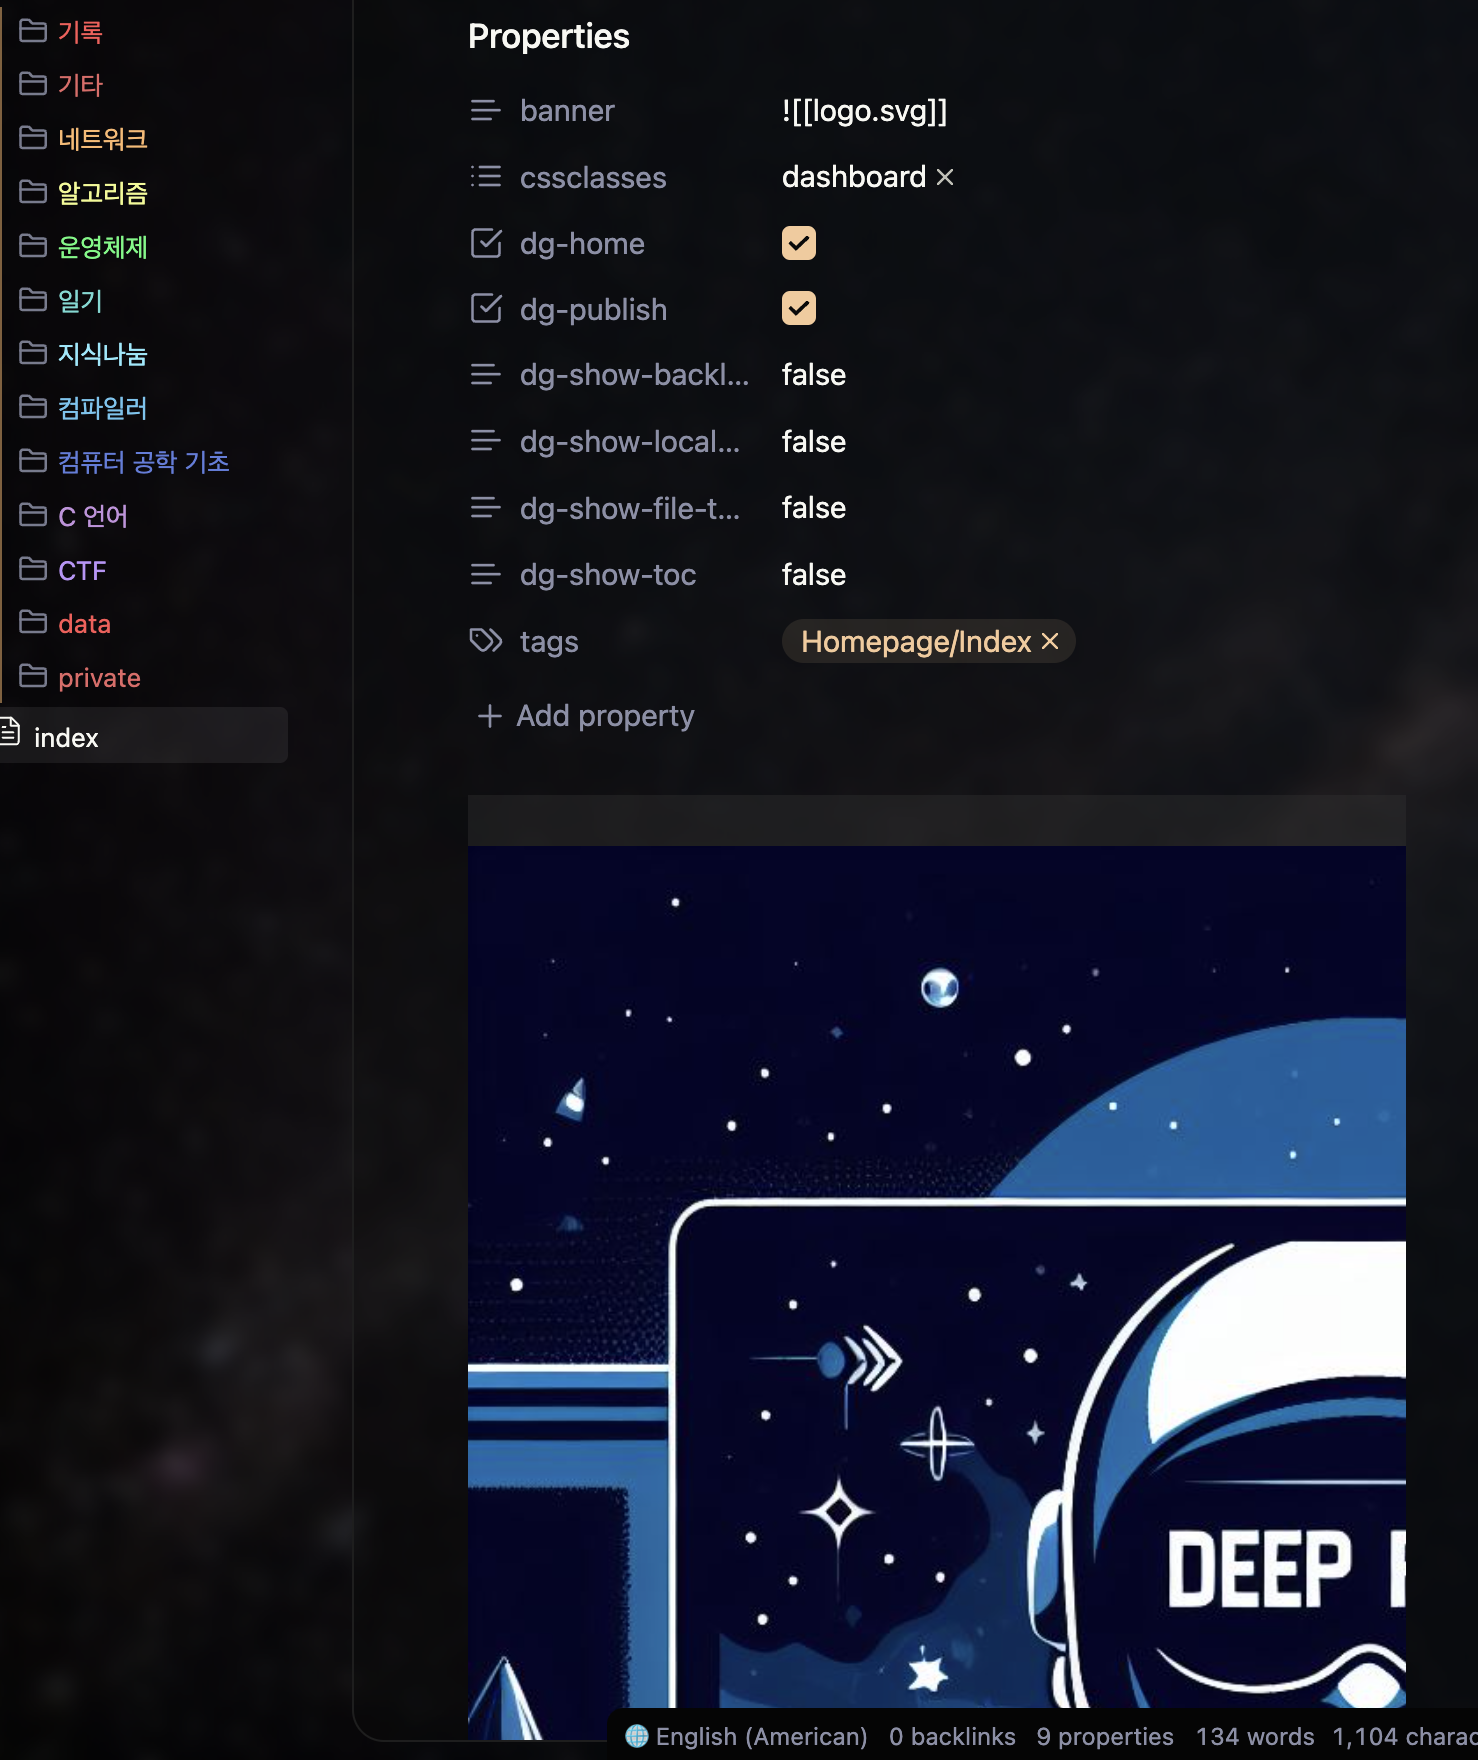
For the homepage, it should look like this
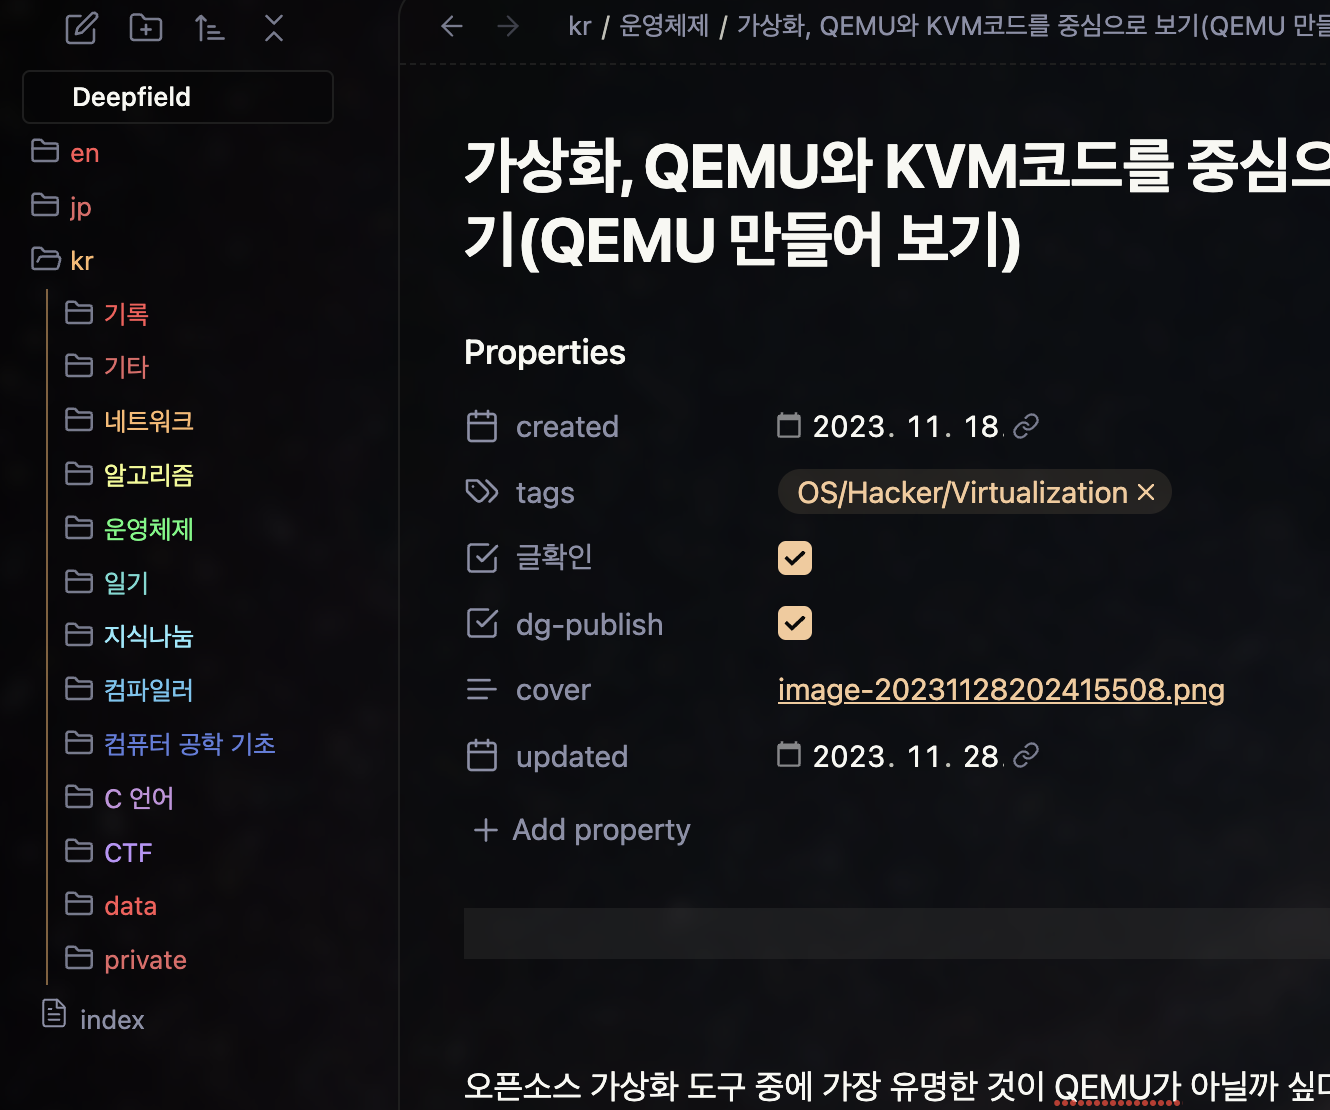
Also, if you have a note that want to upload, the set-up would look like below.
Finally, when you have set up dg-pulish and want to upload, click the plugin button and you will see the screen below.
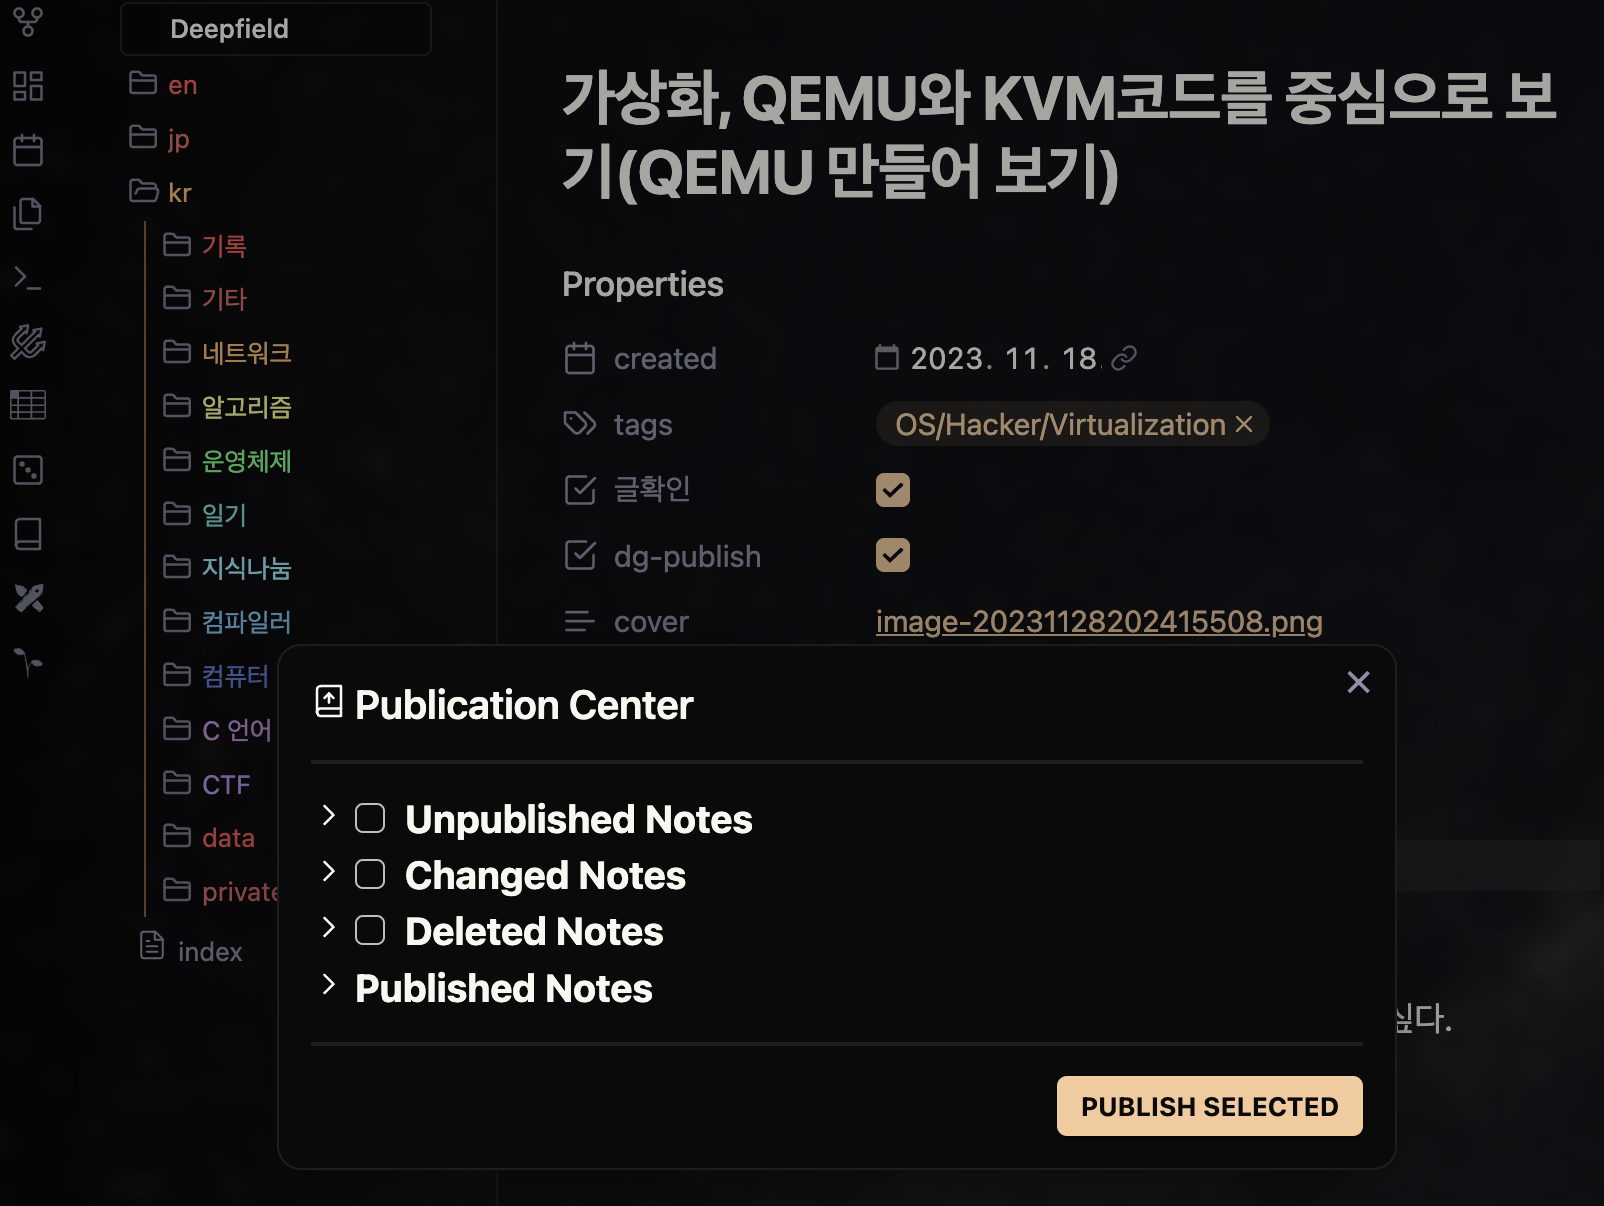
Now, you can upload your notes right away!!
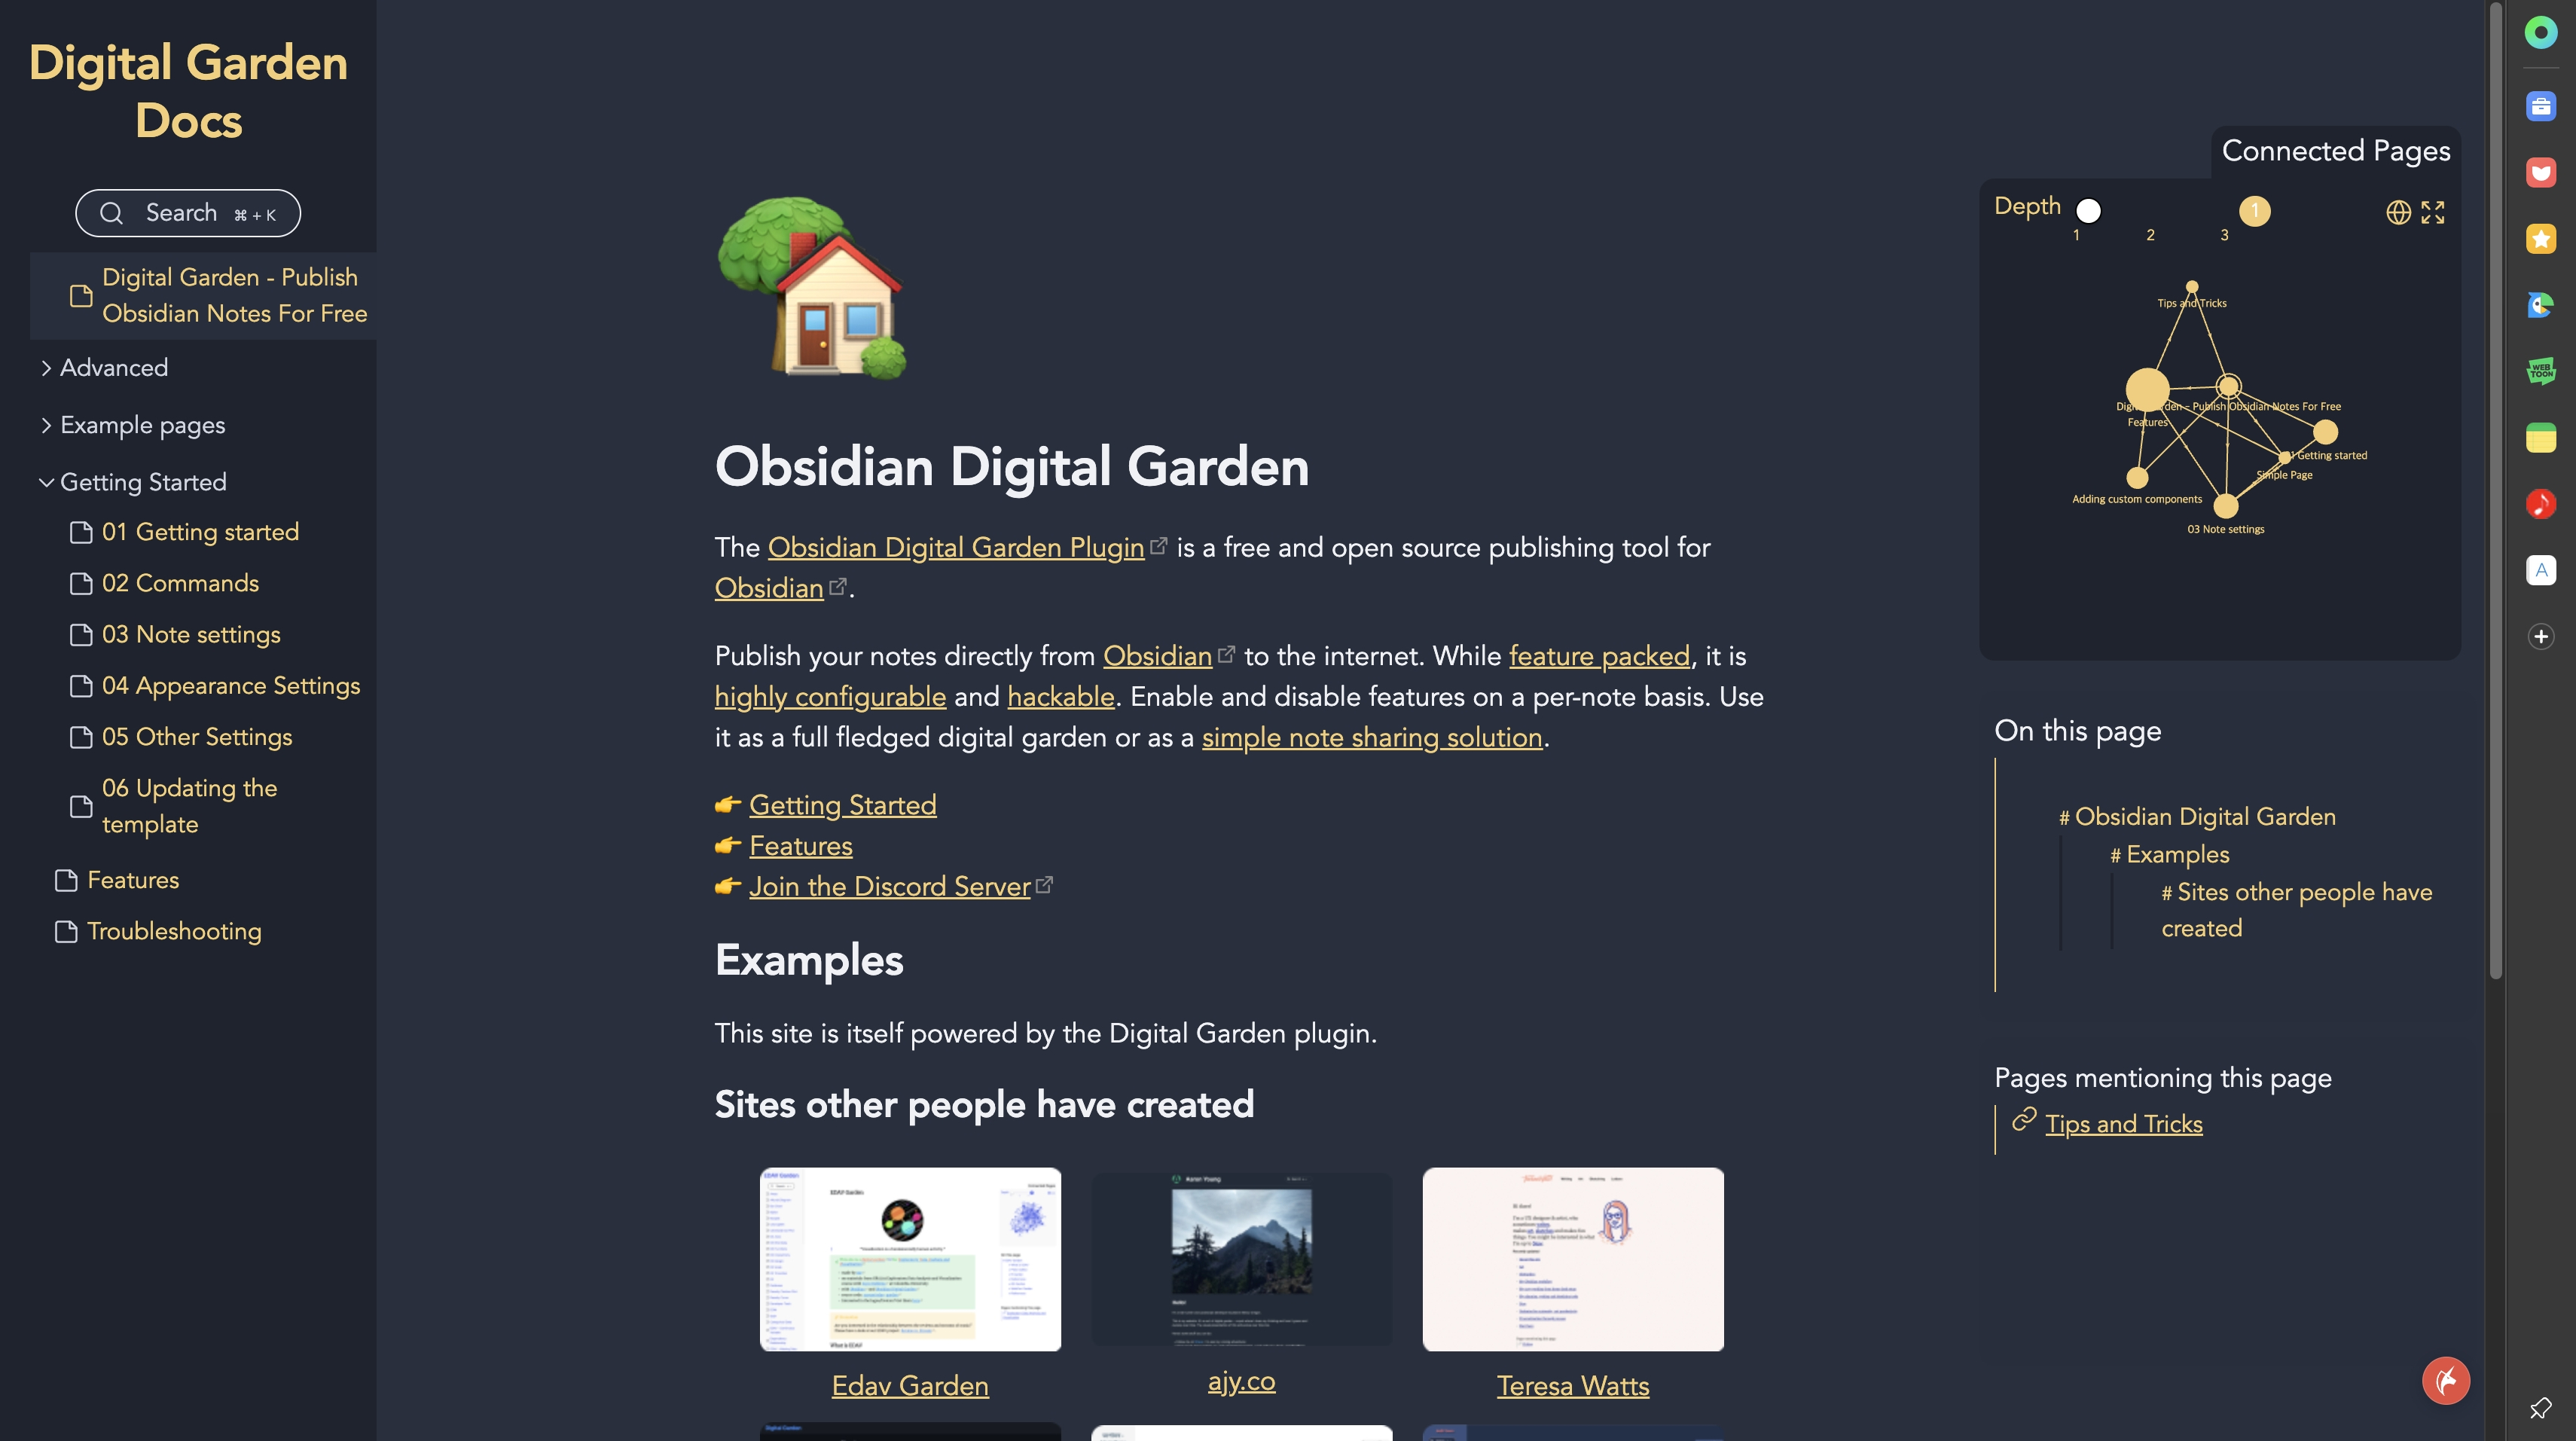
You'll probably end up with a site that looks similar to the one below once everything is set up.
My setup
This was really more of an introduction to how to set up the digital garden plugin, and now I'm going to explain the settings I use and how to use them.
Design
The above site is also a pretty good personal blog, but in my case, I changed the design a bit by referring to other people's blogs.
You don't have to use the my elements either, you can also take a design you like from the example sites I've posted below.
To get the design elements, you'll need to copy and paste the file src/site/styles/custom-style.scss, copy the file custom-style.scss and paste it into your blog's src/site/styles/ folder.
custom-style.scss file for style custom, so if you like someone else's site, you can use their custom-style.scss file.
Other Designs
In my case, I've added a few more elements that I've been using in Obsidian.
The additional design elements are files in the src/site/styles/user folder, and there are three in total.
- center-img.css
- giscus.css
- round-img.css
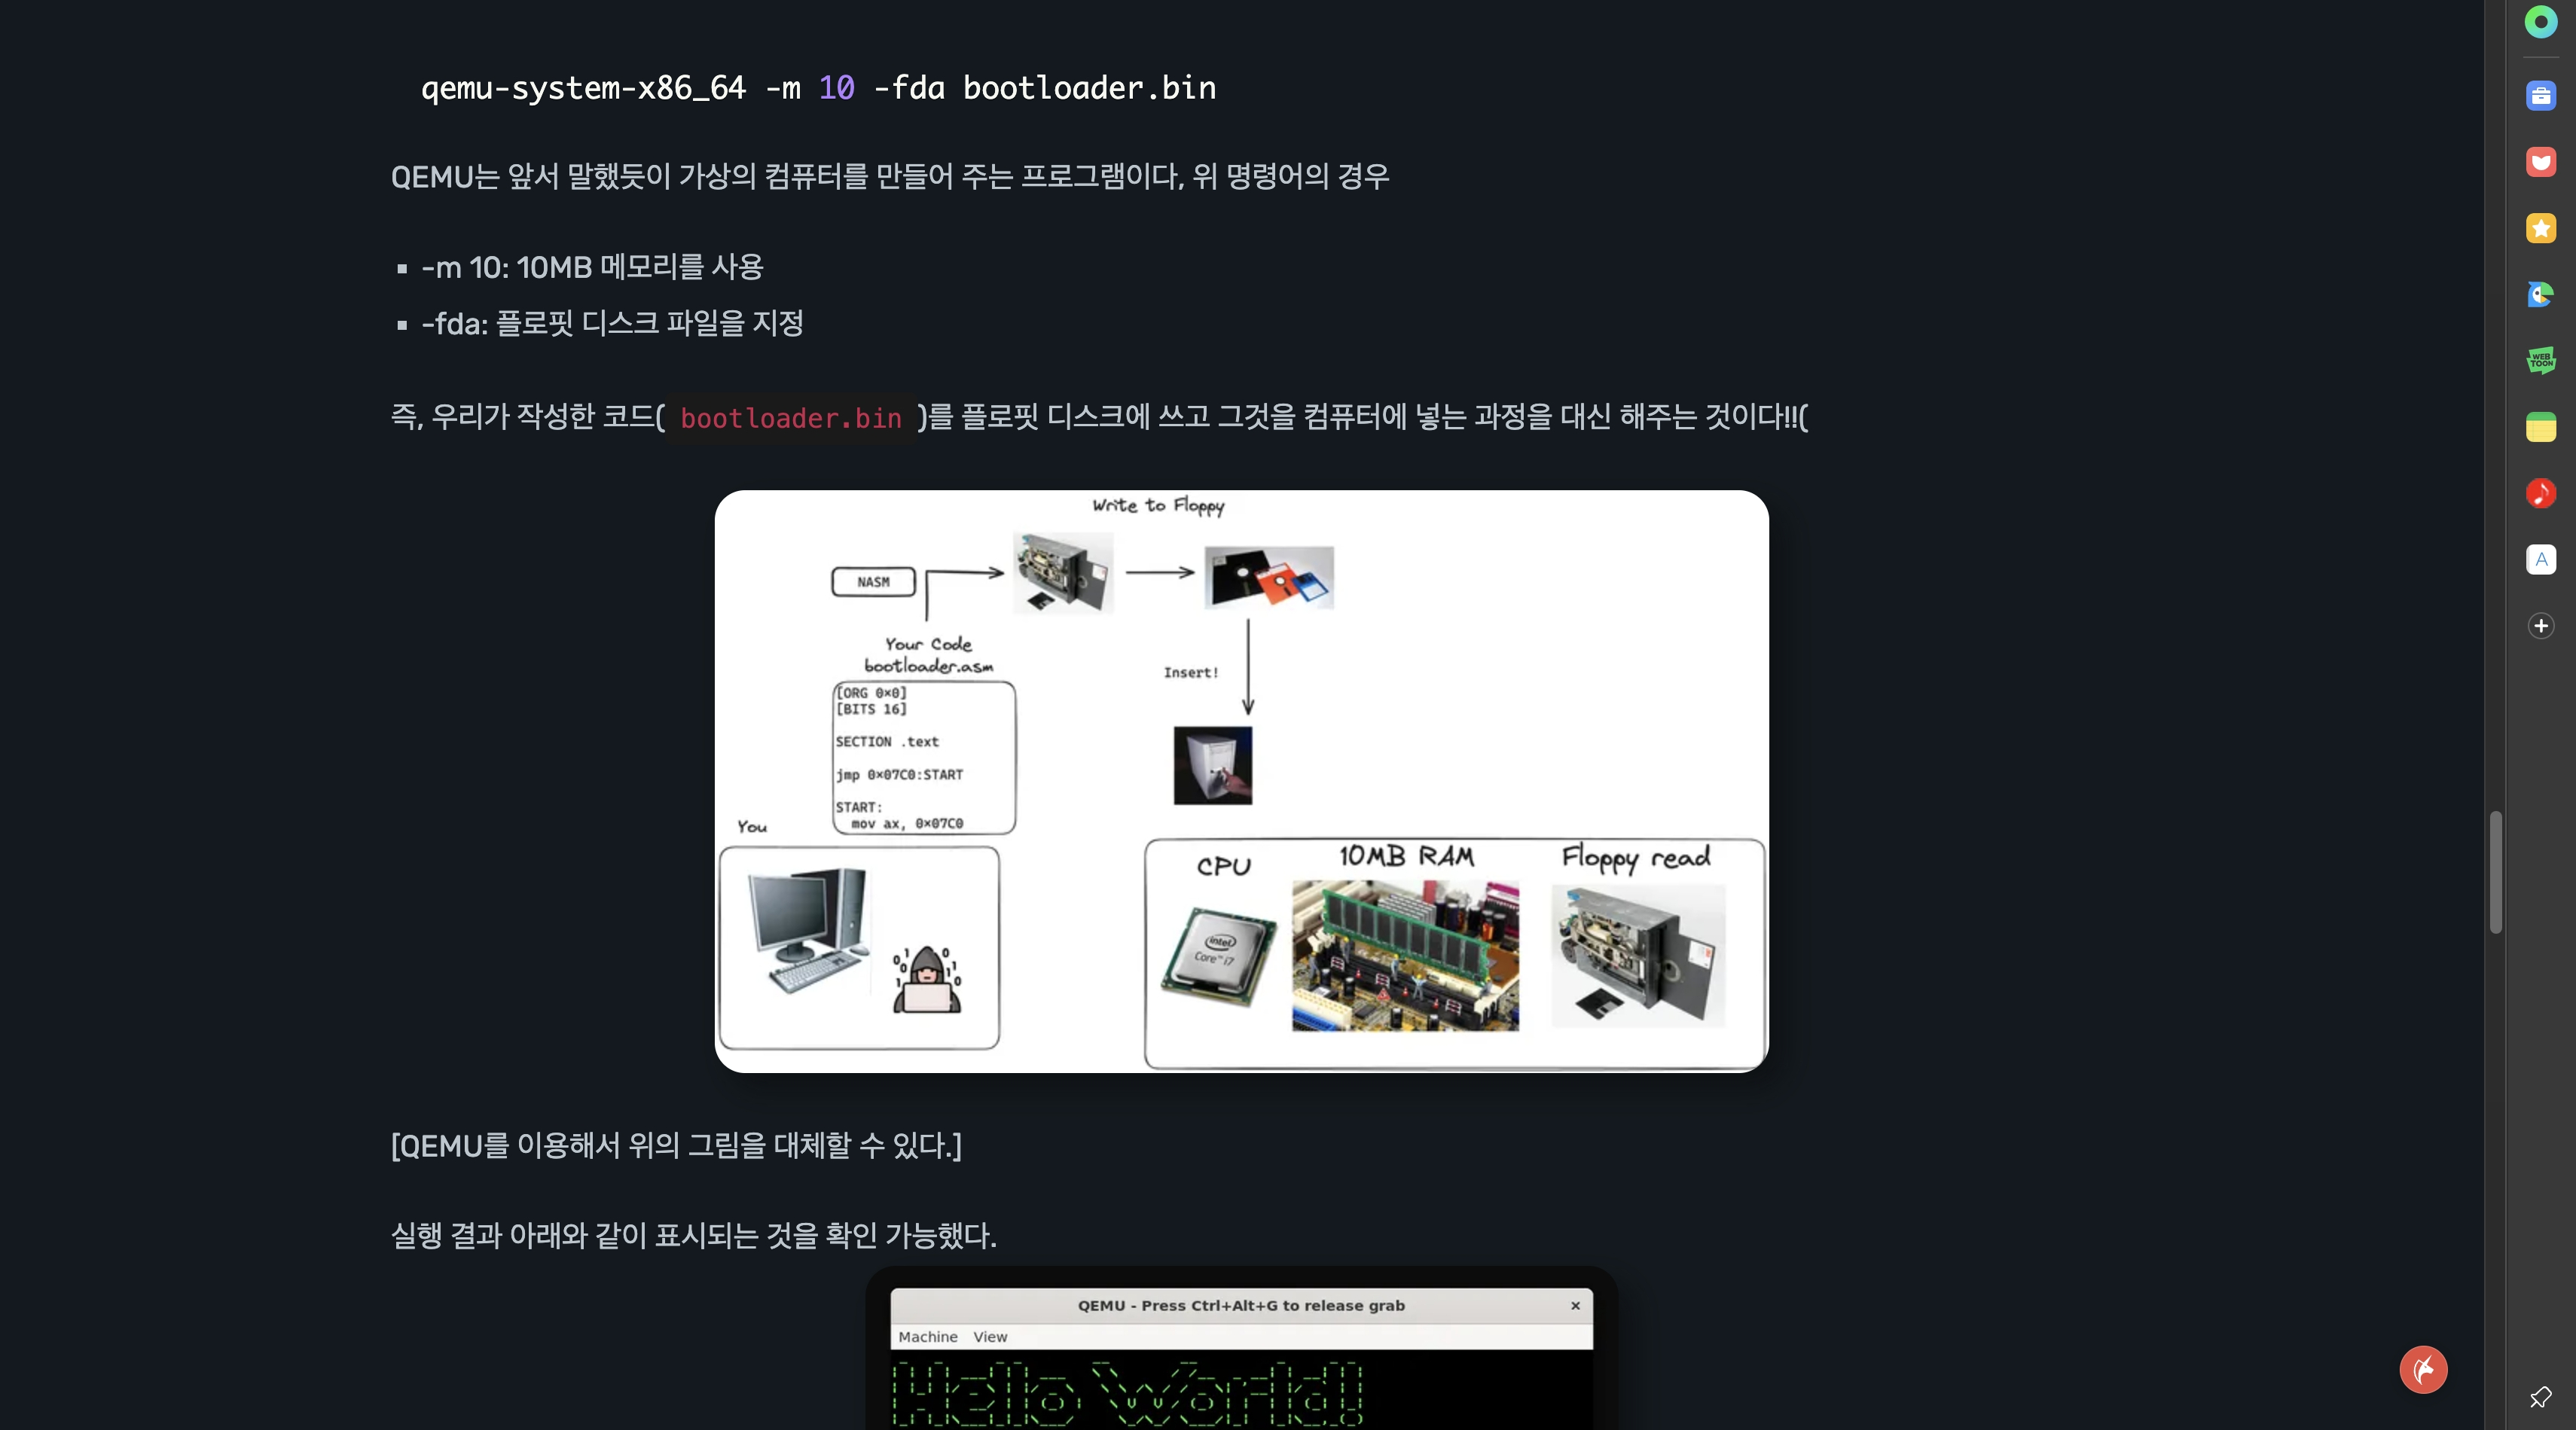
The important ones here are center-img and round-img, which you can use to literally move the photo to the center.
In my case, I put an element like center next to the photo name, like !center in Obsidian to center the desired photo, but if you copy and paste the above file, you can use the same function as Obsidian.
After paste the above files, you can see that the photo is centered and the corners are rounded, as shown in the photo below.
Appendix
As the plugin is not yet complete, there are cases where photos are broken or links are not connected, but the plugin will be better in the future, so I am very satisfied with it for now.
I think it's a good option for anyone who wants to start a personal blog but is hesitant to do so.